(在家觀看 = 0%,在校觀看 = 100%)
100% 在校觀看日期及時間:
自由選擇,點選以下地區觀看辦公時間及位置
課時: 36 小時
(18 小時課堂 + 18 小時於家中透過上網來控制本中心的器材及軟件,並依照筆記來進行實習)
享用時期: 6 星期。進度由您控制,可快可慢。
課堂錄影導師:Franco
在校免費試睇:首 1 小時,請致電以上地點與本中心職員預約。
本課程提供在校免費重睇及導師解答服務。
(在家觀看 = 100%,在校觀看 = 0%)
100% 在家觀看日期及時間:
每天 24 小時全天候不限次數地觀看
課時: 36 小時
(18 小時課堂 + 18 小時於家中透過上網來控制本中心的器材及軟件,並依照筆記來進行實習)
享用時期: 6 星期。進度由您控制,可快可慢。
課堂錄影導師:Franco
在校免費試睇:首 1 小時,請致電以上地點與本中心職員預約。
本課程提供導師解答服務。
Cisco Systems Inc. 是全球最大的網路設備生產商,在世界各地設有 120 個以上的分支據點。Cisco 的產品包括 Switch (交換器)、LAN Router (區域網路由器)、WAN Router (廣域網路由器)、IOS (Internetwork Operating System) 網路管理操作系統、ASA (Adaptive Security Appliances)、IPS (Intrusion Prevention System) 等。全球的大企業、銀行、大學和政府機構之網路設備,無一不採用 Cisco 的產品,因此,管理 Cisco 網路設備便成為一門專業的學問。
為了能證明你有專業水準來安裝、設定及管理 Cisco 的網路安全產品,Cisco 便推出其 CCNA Security (Cisco Certified Network Associate - Security,Cisco 認可網路夥伴 – 網路安全 ) 國際認可考試。本中心的 CCNA Security 課程由 Franco Tsang (擁有 CCIE : Security, CCIE : Service Provider 及 CCIE : Routing and Switching 三項 CCIE 證書) 籌備多時,精心編排。由上堂、溫習、實習、考試研習、做試題至最後考試,均為你度身訂造,作出有系統的編排。務求真正教識你,又令你考試及格。
本課程緊貼時代需要,相關的概念 / 內容 / 產品能被應用到不同的情景中,例如:
- 在 AWS 上玩 Cisco ASA (Adaptive Security Appliance) 9.9:
https://www.facebook.com/systematic.hk/photos/a.173134451964/10155191936036965/ - SSL / TLS 評分由 A+ (滿分, without CAA) 到 A+ (滿分, with CAA):
https://www.facebook.com/systematic.hk/photos/a.173134451964/10155639668736965/ - RSA 效能測試:
https://www.facebook.com/systematic.hk/photos/a.173134451964/10154270184056965/ - MAC Flap + 收到過千萬個的 broadcasts + CPU% 超高:
https://www.facebook.com/systematic.hk/photos/a.173134451964/10153938556931965/ - 更多應用情景 / 導師在 Facebook 所分享的文章:
https://www.systematic.com.hk/course_Franco.htm?panel=2
| 課程名稱: |
CCNA Security 國際認可證書課程 - 簡稱:CCNA Security Training Course |
| 課程時數: | 合共 36 小時 課堂 18 小時 (共 6 堂) 及實習時段 18 小時 (共 6 節) |
| 適合人士: | 具備 CCNA 知識的人士 |
| 授課語言: | 以廣東話為主,輔以英語 |
| 課程筆記: | 本中心導師親自編寫英文為主筆記,而部份英文字附有中文對照。 |
| 1. Franco Tsang (CCIE #19772) 親自教授: | Franco 善於控制學習節奏,深入淺出,令學員在輕鬆氣氛下,掌握電腦技巧。 | ||||||||||||
| 2. Franco Tsang 親自編寫筆記: | Franco 親自編寫筆記,絕對適合考試及實際管理網路之用,令你無須「死鋤」如字典般厚及不適合香港讀書格調的書本。 | ||||||||||||
| 3. 提供模擬考試題目: | 本中心為學員提供充足的模擬考試題目,每條考試題目均附有標準答案。而較難理解的題目,均會附有 Franco 的解釋。 | ||||||||||||
| 4. 理論與實習並重: | 本中心的 CCNA Security 課程為全港時數最長,合共 36 小時,令學員真正了解及掌握課程內容。
|
||||||||||||
| 5. 免費重讀: | 傳統課堂學員可於課程結束後三個月內免費重看課堂錄影。 | ||||||||||||
只要你於下列科目取得合格成績,以及擁有有效的 CCNA 證書,便可獲 Cisco 頒發 CCNA Security 國際認可證書:
|
本中心為 Cisco 指定的 CCNA Security 考試試場,報考時請致電本中心,登記欲報考之科目考試編號、考試日期及時間 (最快可即日報考)。 臨考試前要繳付考試費 (見上表),及必須出示下列兩項有效之身份證明文件,否則考生不可進行考試,而已繳付之考試費亦不會退回: 考試題目由澳洲考試中心傳送到你要應考的電腦,考試時以電腦作答。所有考試題目均為英文,而大多數的考試題目為單項選擇題 (意即 O) 或多項選擇題 (意即 口),其餘則為配對題及實戰題。作答完成後會立即出現你的分數,結果即考即知!考試不合格便可重新報考,不限次數。欲知道作答時間、題目總數、合格分數等詳細考試資料,可瀏覽本中心網頁 "各科考試分數資料"。 |
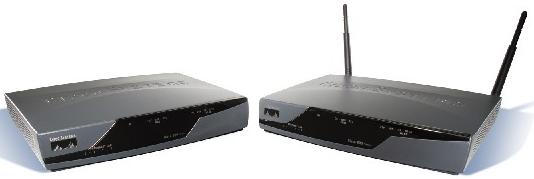
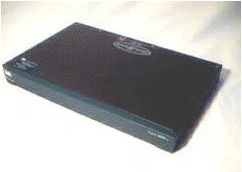
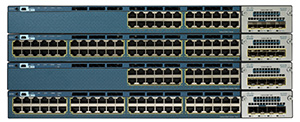
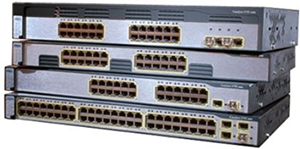
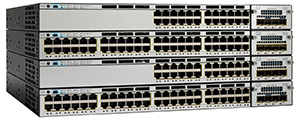
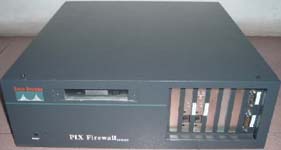
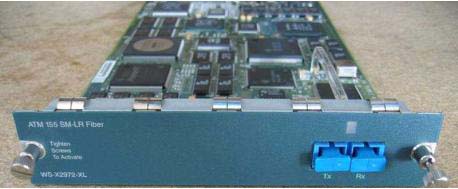
為進一步加強本中心 Cisco 的課程質素,本中心投放大量資源購買 Cisco 器材,以供學員進行實習。以下是本中心擁有的 Cisco 器材 (種類繁多,未能盡錄): |
 |
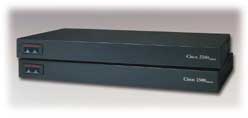 |
| Cisco Router 800 Series (ISR) | Cisco Router 2500 Series |
 |
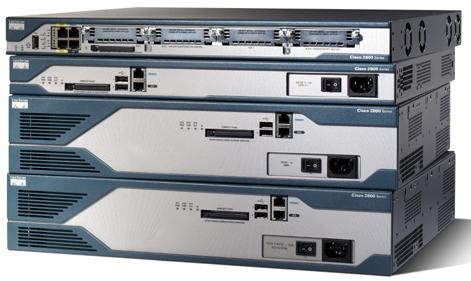 |
| Cisco Router 2600 Series | Cisco Router 2800 Series (ISR) |
 |
 |
| Cisco Router 2900 Series (ISR) | Cisco Router 3600 Series |
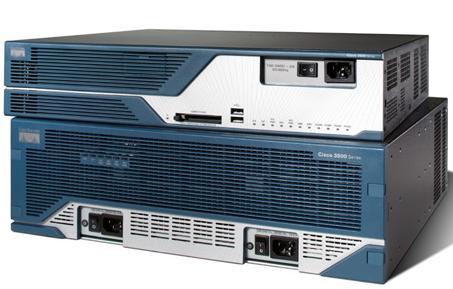 |
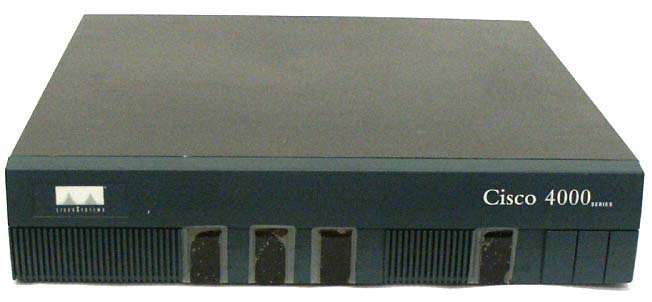 |
| Cisco Router 3800 Series (ISR) | Cisco Router 4000 Series |
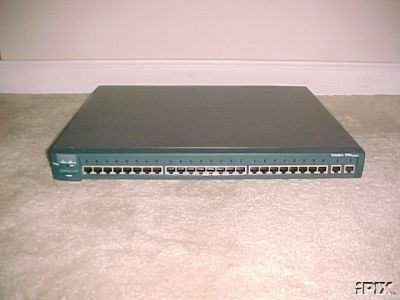 |
 |
| Cisco Catalyst Switch 1900 Series | Cisco Catalyst Switch 2950 Series |
 |
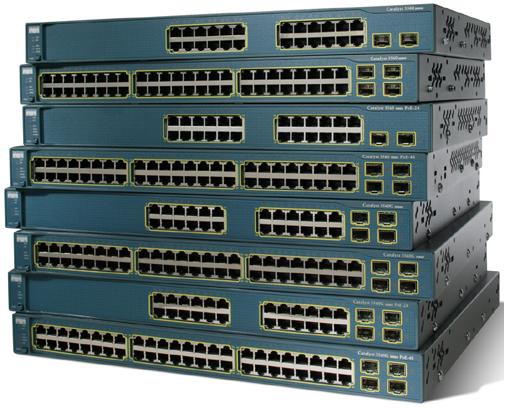 |
| Cisco Catalyst Multilayer Switch 3550 Series | Cisco Catalyst Multilayer Switch 3560 Series |
 |
 |
Cisco Catalyst Multilayer Switch 3560X Series |
Cisco Catalyst Multilayer Switch 3750G Series |
 |
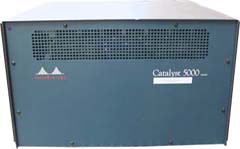 |
| Cisco Catalyst Multilayer Switch 3750X Series | Cisco Catalyst Multilayer Switch 5000 Series |
 |
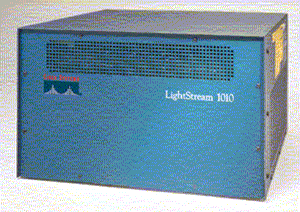 |
| Cisco PIX Firewall | Cisco LightStream 1010 ATM Switch |
 |
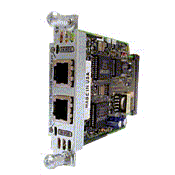 |
| Cisco ATM Module | Cisco FXS Voice Module |
 |
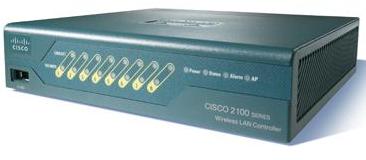 |
| Cisco IP Phone 7911G | Cisco Wireless LAN Controller 2106 |
 |
 |
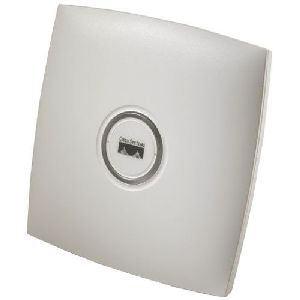
| Cisco Aironet Lightweight Access Point 1130AG | PSTN Simulator |
 |
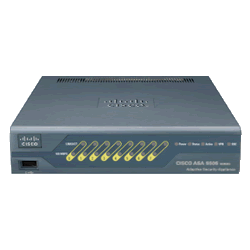 |
| ISDN Simulator | Cisco ASA 5505 |
 |
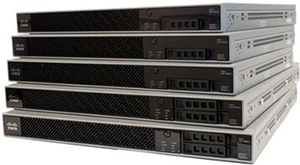 |
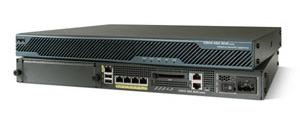
| Cisco ASA 5510 | Cisco ASA 5512X |
 |
|
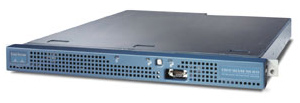
| Cisco IPS 4210 |
|
課程名稱:CCNA Security 國際認可證書課程 - 簡稱:CCNA Security Training Course |
1 Security Concepts
1.1 Common security principles
1.1.1 CIA Triad
1.1.1.1 Confidentiality
1.1.1.2 Integrity
1.1.1.3 Availability
1.1.2 SIEM
1.2 Common security threats
1.3 Cryptography concepts
1.3.1 Encryption and decryption
1.3.2 Symmetric encryption
1.3.3 Asymmetric encryption
1.3.4 Comparison between symmetric and asymmetric encryption
1.3.4.1 Key management of symmetric and asymmetric encryption
1.3.5 Diffie-Hellman (DH) key exchange
1.3.6 Hash
1.3.7 Digital signature
1.3.8 Digital certificate
1.3.9 Public key infrastructure (PKI)
1.3.10 TPM
1.4 Network topologies
1.4.1 Campus area network (CAN)
1.4.2 Wide area network (WAN)
1.4.2.1 MPLS
1.4.2.2 Metro Ethernet
1.4.3 Data center
1.4.4 SOHO
1.4.5 Network security for a virtual environment
1.4.5.1 IaaS and PaaS
2 Secure Routing and Switching
2.1 CDPv1 vulnerabilities
2.2 CAM overflow and MAC spoofing
2.2.1 CAM overflow
2.2.2 MAC spoofing
2.2.3 Dynamic port security
2.2.4 Lab: dynamic port security
2.2.4.1 Lab topology
2.2.4.2 Lab goal
2.2.4.3 Lab procedure
2.3 CoPP and CPPr
2.3.1 Control plane and data plane
2.3.1.1 Data plane
2.3.1.2 Control plane
2.3.2 CoPP
2.3.2.1 Lab: CoPP
2.3.2.1.1 Lab topology
2.3.2.1.2 Lab goal
2.3.2.1.3 Lab procedure
2.3.3 CPPr
2.3.3.1 Virtual control plane categories
2.3.3.2 Lab: CPPr
2.3.3.2.1 Lab topology
2.3.3.2.2 Lab goal
2.3.3.2.3 Lab procedure
2.4 Neighbor authentication in routing protocols
2.4.1 Plain text and MD5 authentication
2.4.2 Lab: Neighbor authentication in OSPF
2.4.2.1 Lab topology
2.4.2.2 Lab goal
2.4.2.3 Lab procedure
2.4.3 Lab: Neighbor authentication in EIGRP
2.4.3.1 Lab topology
2.4.3.2 Lab goal
2.4.3.3 Lab procedure
2.5 VLAN security and private VLAN
2.5.1 VLAN Hopping
2.5.1.1 802.1Q or ISL Tagging Attack
2.5.1.2 Double-encapsulated 802.1Q
2.5.2 Private VLAN
2.5.2.1 Without private VLAN
2.5.2.2 Introduction to private VLAN
2.5.2.2.1 Isolated VLAN
2.5.2.2.2 Community VLAN
2.6 DHCP snooping and DAI
2.6.1 DHCP snooping
2.6.1.1 DHCP
2.6.1.2 Threats
2.6.1.3 DHCP snooping
2.6.1.4 DHCP snooping binding database
2.6.2 DAI
2.6.2.1 Basic ARP review
2.6.2.2 ARP spoofing
2.6.2.3 DAI and ARP spoofing
2.7 Multiple privilege levels
2.7.1 Lab: Multiple privilege levels
2.7.1.1 Lab topology
2.7.1.2 Lab goal
2.7.1.3 Lab procedure
2.8 NTP
2.8.1 NTP and NTP authentication
2.8.2 Lab: NTP and NTP authentication
2.8.2.1 Lab topology
2.8.2.2 Lab goal
2.8.2.3 Lab procedure
2.9 uRPF
2.9.1 Introduction to uRPF
2.9.2 uRPF and asymmetric routing
2.9.3 Lab: uRPF and asymmetric routing
2.9.3.1 Lab topology
2.9.3.2 Lab goal
2.9.3.3 Lab procedure
2.10 BPDU guard
2.10.1 Without BPDU guard
2.10.2 How BPDU guard works
2.10.3 Lab: BPDU guard
2.10.3.1 Lab topology
2.10.3.2 Lab goal
2.10.3.3 Lab procedure
2.11 SPAN
2.11.1 Introduction to SPAN
2.11.2 Lab: SPAN
2.11.2.1 Lab topology
2.11.2.2 Lab goal
2.11.2.3 Lab procedure
2.12 secure boot-image
2.12.1 Lab: secure boot-image
2.12.1.1 Lab topology
2.12.1.2 Lab goal
2.12.1.3 Lab procedure
2.13 OOB and In-Band
2.13.1 OOB
2.13.2 In-Band
2.14 no switchport
3 Secure Access
3.1 AAA
3.1.1 Introduction to AAA
3.1.1.1 Authentication
3.1.1.2 Authorization
3.1.1.3 Accounting
3.1.2 Local AAA
3.1.2.1 Lab: Local AAA
3.1.2.1.1 Lab topology
3.1.2.1.2 Lab goal
3.1.2.1.3 Lab procedure
3.2 Cisco Secure ACS
3.2.1 Introduction to centralized secure access needs
3.2.2 TACACS+ and RADIUS
3.2.3 Install ACS
3.2.4 Lab: ACS
3.2.4.1 Lab: ACS: Remote management
3.2.4.1.1 Lab topology
3.2.4.1.2 Lab goal
3.2.4.1.3 Lab procedure
3.2.4.2 Lab: ACS: Configure routers to implement AAA with ACS
3.2.4.2.1 Lab topology
3.2.4.2.2 Lab goal
3.2.4.2.3 Lab procedure
3.2.4.3 Lab: ACS: Create users
3.2.4.3.1 Lab topology
3.2.4.3.2 Lab goal
3.2.4.3.3 Lab procedure
3.2.4.4 Lab: ACS: Configure TACACS server in a router
3.2.4.4.1 Lab topology
3.2.4.4.2 Lab goal
3.2.4.4.3 Lab procedure
3.2.4.5 Lab: ACS: Configure AAA authentication
3.2.4.5.1 Lab topology
3.2.4.5.2 Lab goal
3.2.4.5.3 Lab procedure
3.2.4.6 Lab: ACS: AAA Accounting
3.2.4.6.1 Lab topology
3.2.4.6.2 Lab goal
3.2.4.6.3 Lab procedure
3.3 EAP
3.3.1 Introduction to EAP
3.3.2 EAP-PEAP
3.3.3 EAP-FAST
3.4 ISE and BYOD
3.4.1 Introduction to ISE
3.4.2 Switch’s configurations under ISE environment
3.4.3 Default ACL
3.4.4 Order of authentication
3.4.5 Lost or stolen device
4 Firewall and IPS
4.1 Basic firewall concepts
4.1.1 Standard and extended access-list
4.2 Reflexive access lists
4.2.1 Lab: Reflexive access lists
4.2.1.1 Lab topology
4.2.1.2 Lab goal
4.2.1.3 Lab procedure
4.3 Stateful vs stateless
4.4 Zoned-based firewall
4.4.1 Lab: Zone-based firewall
4.4.1.1 Lab topology
4.4.1.2 Lab goal
4.4.1.3 Part 1: Topology building
4.4.1.4 Part 2: class map
4.4.1.5 Part 3: policy map
4.4.1.6 Part 4: Create zones and assign zones to interfaces
4.4.1.7 Part 5: Create a zone pair and assign a policy map to a zone pair
4.5 ASA
4.5.1 Basic configurations
4.5.1.1 Save configurations
4.5.1.2 Erase saved configurations
4.5.1.3 Erase all configurations
4.5.1.4 ASA interfaces
4.5.1.4.1 Physical switch ports
4.5.1.4.2 Logical VLAN interfaces
4.5.1.4.3 Security levels
4.5.1.4.4 Lab: ASA initialization and security levels
4.5.1.4.4.1 Physical lab topology
4.5.1.4.4.2 Logical lab topology
4.5.1.4.4.3 Lab goal
4.5.1.4.4.4 Lab procedure
4.5.2 Enable telnet in ASA
4.5.2.1 Lab: Telnet in ASA
4.5.2.1.1 Lab topology
4.5.2.1.2 Lab goal
4.5.2.1.3 Lab procedure
4.5.3 Application layer protocol inspection
4.5.3.1 Session management path
4.5.3.2 Default inspection
4.5.3.3 Deep inspection for HTTP traffic
4.5.3.3.1 Lab: Strict inspection for HTTP traffic
4.5.3.3.1.1 Lab topology
4.5.3.3.1.2 Lab goal
4.5.3.3.1.3 Lab procedure
4.5.4 Transparent mode
4.5.4.1 Introduction to transparent mode
4.5.4.2 Lab: Transparent mode
4.5.4.2.1 Lab topology
4.5.4.2.2 Lab goal
4.5.4.2.3 Lab procedure
4.5.5 ASDM
4.5.5.1 Introduction to ASDM
4.5.5.2 Lab: ASDM
4.5.5.2.1 Lab topology
4.5.5.2.2 Lab goal
4.5.5.2.3 Lab procedure
4.5.6 NAT
4.5.6.1.1 Lab: Static NAT
4.5.6.1.1.1 Lab topology
4.5.6.1.1.2 Lab goal
4.5.6.1.1.3 Lab procedure
4.5.7 Multiple Contexts
4.5.7.1 Introduction to multiple contexts
4.5.7.2 Appropriate moment to use multiple contexts
4.5.8 Failover
4.5.9 Hairpinning
4.6 IPS
4.6.1 IDS, IPS, HIPS and honeypot
4.6.1.1 IDS
4.6.1.2 IPS
4.6.1.3 HIPS
4.6.1.4 Honeypot
4.6.2 Alarms
4.6.3 Demonstration: IOS IPS
4.6.3.1 Demonstration topology
4.6.3.2 Demonstration goal
4.6.3.3 Demonstration procedure
4.7 Sourcefire and FirePOWER
4.7.1 Sourcefire
4.7.2 FirePOWER
5 VPN
5.1 IPsec site-to-site VPN
5.1.1 Introduction to IPsec site-to-site VPN
5.1.2 IPsec protocols
5.1.2.1 AH
5.1.2.2 ESP
5.1.3 Tunnel mode and transport mode
5.1.3.1 Tunnel mode
5.1.3.2 Transport mode
5.1.4 IKE
5.1.4.1 IKE phases
5.1.4.2 IKE configurations in Cisco IOS devices
5.1.4.3 IKE pre-shared key in Cisco IOS devices
5.1.5 Transform set
5.1.6 Lifecycle of IPsec VPN
5.1.7 Lab: Site-to-site IPsec VPN
5.1.7.1 Lab topology
5.1.7.2 Lab goal
5.1.7.3 Lab procedure
5.1.7.3.1 Part 1: Topology building
5.1.7.3.2 Part 2: IKE policy and pre-shared key
5.1.7.3.3 Part 3: Transform set
5.1.7.3.4 Part 4: Crypto ACL
5.1.7.3.5 Part 5: Crypto map
5.1.7.3.6 Part 6: Verification
5.2 SSL VPN
5.2.1 Introduction to SSL VPN
5.2.2 Lab: SSL VPN in ASA (through ASDM)
5.2.2.1 Lab topology
5.2.2.2 Lab goal
5.2.2.3 Lab procedure
5.2.2.3.1 Part 1: Topology building
5.2.2.3.2 Part 2: Enable ASDM in ASA
5.2.2.3.3 Part 3: Configure SSL VPN through ASDM
5.2.2.3.4 Part 4: Verification (Clients)
5.2.2.3.5 Part 5: Verification (ASA)
5.2.3 Split tunneling
6 Content and endpoint security
6.1 Proxy and WSA
6.1.1 Proxy
6.1.2 WSA
6.1.2.1 Introduction to WSA
6.1.2.2 WSA deployment
6.2 ESA
6.2.1 Introduction to ESA
6.2.2 Deployment and information flow
6.2.2.1 Inbound information flow
6.2.2.2 Outbound information flow
6.2.3 Spam blocking
7 Appendix 1: Lab physical topology
8 Appendix 2: Topology building by interVLAN routing
9 Appendix 3: Cisco Configuration Professional
9.1 Introduction to Cisco Configuration Professional
9.2 Lab: Connect to IOS router by Cisco Configuration Professional
9.2.1 Lab topology
9.2.2 Lab goal
9.2.3 Lab procedure
10 Appendix 4: Security Device Manager
10.1 Introduction to Security Device Manager
10.2 Lab: Security Device Manager
10.2.1 Lab topology
10.2.2 Lab goal
10.2.3 Lab procedure
11 Appendix 5: Logs of passed authentication in ACS
 付款。
付款。